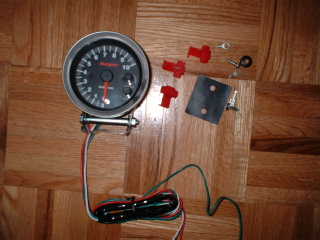
This web site walks the reader through my installation of my Sunpro tach with shift light in my '98 Plymouth Neon EX. The reader should be aware that this information is provided as is and without warranty of any kind. Although every tach I've seen has the same four colour-coded wires as this one, and every '95-'99 Neon I've seen have the same wiring, I haven't seen every tachometer available, nor have I seen every '95-'99 Neon ever built...so it's entirely possible that your Neon or tach (or both) are completely different from mine, and following my instructions on my web page could damage your Neon, Tach, or both! As such, use this information here at your own risk.
When
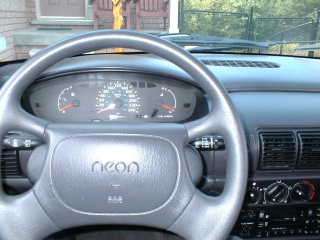
I bought my Neon, it came with a twin cam
2.0L engine supposedly rated at 150 HP (ya right), mated to a
balky 5 speed stick shift...and no tach! How
cheap! Fortunately, the computer in this car protects the engine
with a rev limiter set to cut the juice at 7250 RPM, but that limit
comes up without warning. Thus, I determined that my second mod to
this car would be the installation of a tach. This is how I did it.
STEP 1: Dash removal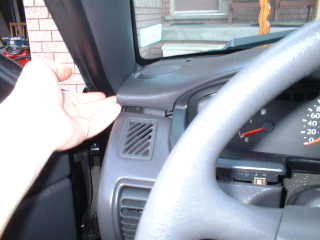
All
the wires I needed are located under the dash. Its rubbermaid
quality means you probably won't break it when popping it up. Easiest
way to do this for me was to start at each end with the car doors
open, then I worked my way towards the gauge pod. It came out easily
and fortunately without damage.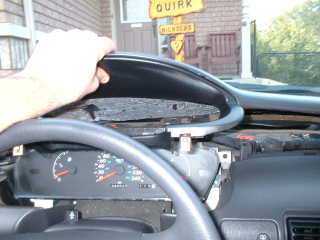
I
lowered the tilt steering wheel all the way, and simply lifted the
dash up and over the steering wheel. At this point, it's easy to see
why the Neon is so cheap...because it's made cheaply. This has the
benefit of making the car easier to modify.
Step 2: Gauge pod removal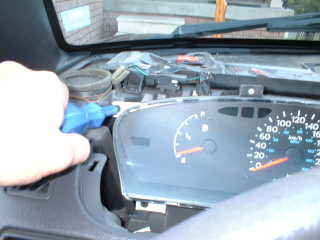
The
signal wire I need for my tach is located behind my gauge pod. There
are four screws to get out. The top two were easy enough,
but...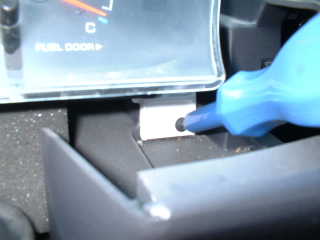
The
bottom two screws were very difficult to get at with a regular
screwdriver. I used a short screwdriver instead and got them
out.
The
gauge pod then simply pulls straight out, since it plugs into two
sockets that you can see here. For step 3, I'm interested in the
right socket, which is connector A. Careful where you put it, the
cheap plastic cover would scratch very easily.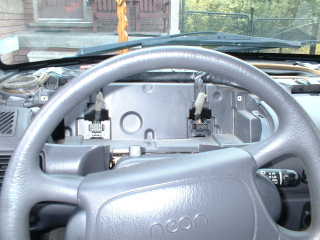
Step 3: Making the connections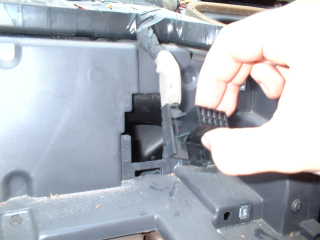
Using
a flat head screwdriver, I moved the tabs in and lifted this
connector up and out of it's place, so I can access the signal wire
for the tach.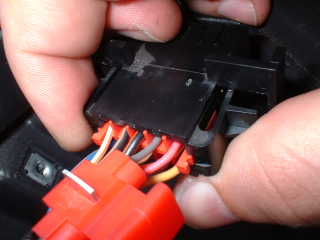
The
wires are numbered on the back of this black plastic
connector...using my test light, I determined that the one for the
tach signal is number 7, the gray one. I spliced into it. Note that
if my cluster already had a tach in it, I'd have to cut this wire
away for my new tach to work, effectively disabling the cluster tach.
I probably could've cut it away anyway, but I felt that was
unnecessary.
And
so, the green wire from my tach is connected to the tach signal wire
that goes (unused) to the instrument cluster.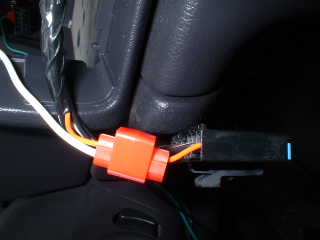
The
easiest location I found from which to splice into the dash lights
was via the rear window defroster button. I popped that out,
disconnected it, and using my test light, found the orange wire to be
responsible for illuminating the dash light. The white wire from the
tach goes there.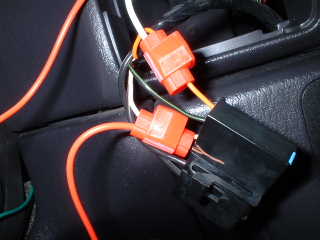
I
also discovered, using my test light, that the white wire going to
the rear window defroster switch is powered when the ignition is
on...so I figured that was the easiest place to splice the red power
wire for the tach into an ignition switched power source.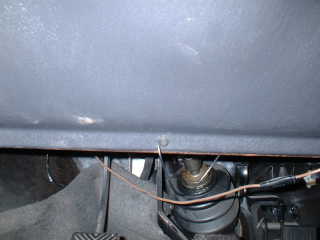
Of
course, it all needs to be grounded...there's a steel subframe
running along the bottom of the dash, I just wrapped the black ground
wire around a screw going into that.
Step 4: Mounting the tach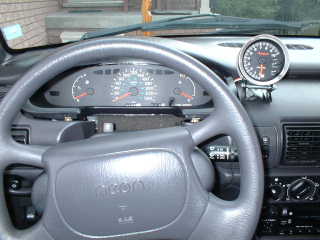
After
neatly running the wires, putting the instrument cluster back in
place, and setting the dashboard lid back into place, I positioned
the tach where I thought I liked it best. I marked the holes where
the screws mount the tach to the dash...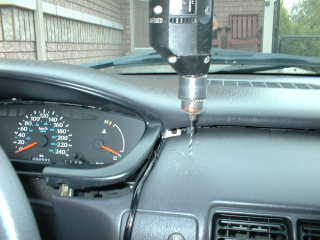
Then
I drilled the pilot holes for the screws. Once the screws are
securely holding the base, I put the tach in, neatly tucked the wires
away, and snapped the dashboard back down in place...here is the
final result: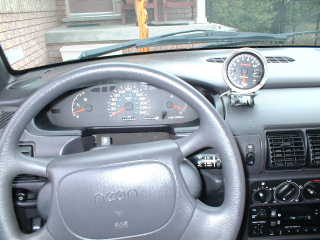
I set the shift light to come on at 6500 RPM, since that's when my engine hits it's peak horsepower point...so when I shift at just past 6500 RPM and before the rev limiter at 7250 RPM, I can remain in my peak power band. My experience has taught me that these engines need to be revved high to make any decent amount of power, which means you should keep a close eye on your oil and consider running a synthetic.
fin
![]()
![]()
![]()