All content of this web page and other related web pages are copyright Paul Quirk. Contact me before copying anything at digitalquirk@yahoo.ca.
This web page explains how to change the front motor mount in the '98 Plymouth Neon EX. It may not be the proper way, and it may not be the best way...heck, maybe it's not safe the way I did it...so take this into consideration, and understand that I make no warranty or guarantee with the information provided. You take this information and use it at your own risk. That said, I'd like to explain why you'd want to change your front motor mount.
Front wheel drive cars have transverse-mounted engines. With the engine mounted this way in the engine bay, the hardest working motor mount in the Neon is the front motor mount. Every time the engine is under load, it tries to turn itself and it's transmission around in the engine bay. The front motor mount prevents it from doing so, ensuring that the engine's power is delivered to the front wheels. Without the front motor mount, you could expect a lot of damage to the engine and the car.
To understand why you should change the front motor mount in your Neon, you first need to understand the motor mount itself. The front motor mount is made out of two pieces of iron separated by rubber. One piece of iron is securely mounted to the frame of the car, the other piece of iron is bolted to the engine and transmission combination. Very firm rubber is used to connect these two pieces of iron. Now, one could just bolt the engine directly to the frame...but every vibration from the engine would be transmitted throughout the vehicle. More importantly, the impact of something bad with the transmission, such as a missed shift, would result in damage to the transmission or engine. If some thing's going to break, it'd be best if something like a motor mount broke before something more serious.
Why would you wish to change the front motor mount? Being made of rubber and being located at the bottom front end of the car, it's going to be exposed to all sorts of oils, salt, dirt, water and who knows what else...over time, the rubber in the front motor mount becomes better at splitting and cracking than it does at stretching and absorbing engine torque. You may have accidently shifted into too low a gear for the speed you were traveling at, which can also cause damage to the front motor mount. Anything that causes the engine to twist in the engine bay excessively can damage the front motor mount. It doesn't hurt to get under your car with a light and inspect the motor mount; if you change your own oil,
Many people are driving their Neon around today with a damaged front motor mount, and may not even know it! This is hard on the car's drive train and hurts performance. It's so easy to check, and so easy to change, the only reason why many Neons are being driven around with bad front motor mounts can be attributed to lack of awareness. Hopefully, this web page will help Neon owners to add checking the front motor mount as part of their regular service maintenance.
Before I start, it should be noted that if you are not aware of how to safely jack up and work under you car, you should consult an automobile professional.
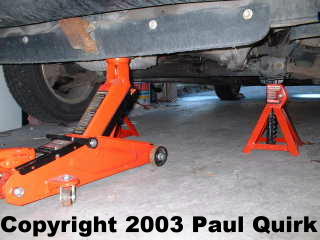
A good trolley jack, along with a pair of sturdy jack stands, is an excellent investment. Here, my car is parked on a solid, smooth, flat surface, my back tires are blocked with the parking brake set, and I've placed the jack under the mass damper, which is right under the motor mount I'm about to change. I've carefully jacked the car up, and safely placed the jack stands on the frame of the car.
Now, with the car secure on it's jack stands, I needed to relieve the weight of the engine off the motor mount.
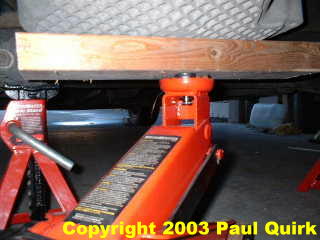
I placed a 2x4 block of wood between my trolley jack and the oil pan (to protect the oil pan from possible damage), and jacked the engine up just a little bit. Too much will cause damage...the idea is to take the pressure off the motor mount, not jack the engine up.
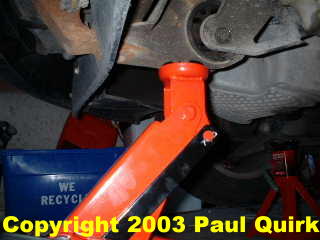
In retrospect, I found this job goes easier if you remove at least part of the strip of plastic running under the bumper and around the mass damper:
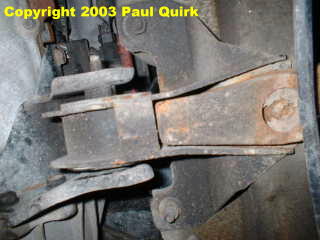
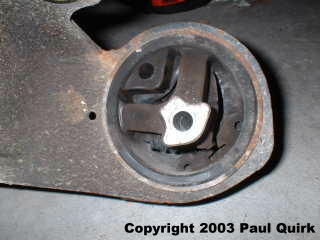
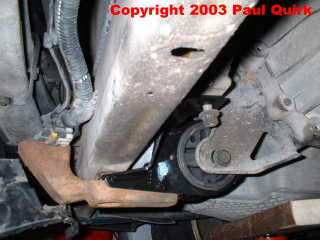
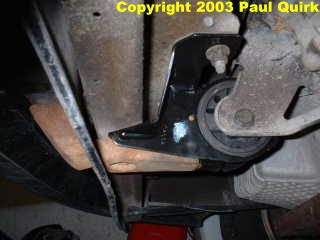
Here's what the front motor mount (and mass damper) looks like, looking up from the floor:
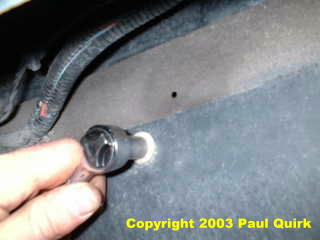
I started by removing the mass damper:
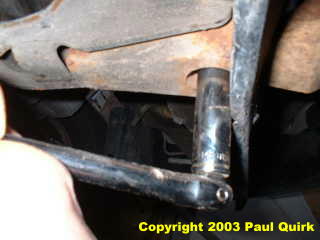
Next, I removed the two bolts connecting the motor mount to the frame:
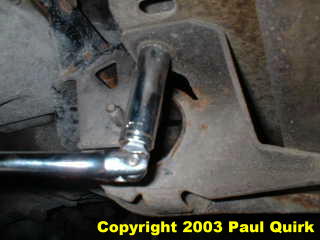
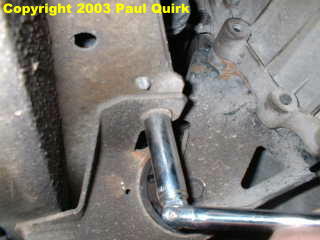
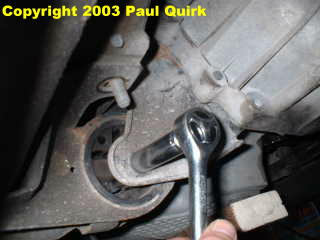
And now, for the bolt running through the middle of the motor mount. Note that there appears to be a large nut on the opposite side; this is actually welded in place. Do not turn it. There is no need to hold it with another wrench. Make sure this is the only one that is turned:
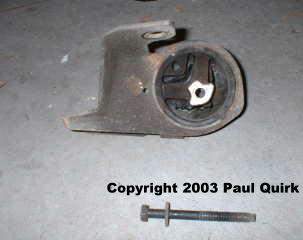
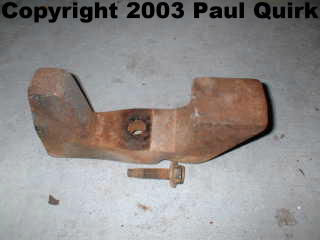
Now, the motor mount can be removed. Here's the old one, then the new one:
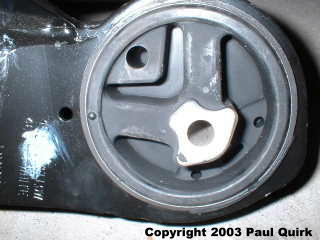
You can see why I wanted to change this motor mount. It has actually separated in the lower right hand corner, and the rubber is visibly deteriorated.
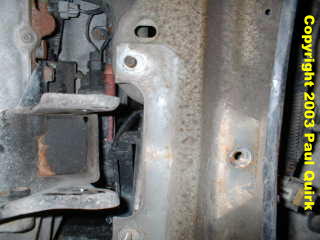
Here's a shot looking up to where the front motor mount used to be:
Time to install the new motor mount. Here's a tip for anyone new to automobile mechanics: Start all of the bolts in by hand, so that all bolts are in place loose, like this:
You can see that the mass damper and it's bolt, the bolt in the middle of the mount, and the two nuts holding the motor mount to the frame are all started in very loose...then, go around and tighten them down in turn, then go around and torque them pretty tight. I don't know what the specs are, but this is a motor mount. I made them very tight.
And there she is, a brand new motor mount, ready for service. What a difference it makes!
fin
![]()
![]()